


- Final Steps
- Posted: September 15, 2008
-
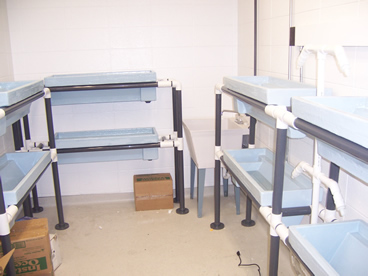
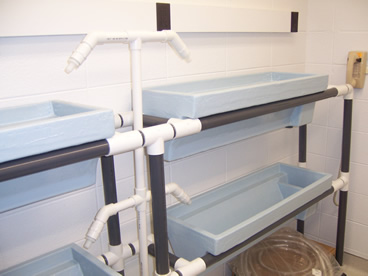
- We haven't posted in a while as we have been constructing the final six tanks, which has taken much of our time. However, we have now constructed and painted all 10 tanks and have built the shelving units that will house 8 tanks (2 tanks are extra). As you can see in the picture above, the tanks have been painted with a blue epoxy-based paint. The epoxy paint was not only chosen for aesthetic purposes, however, for it provides yet another added layer of UV protection for the tanks.
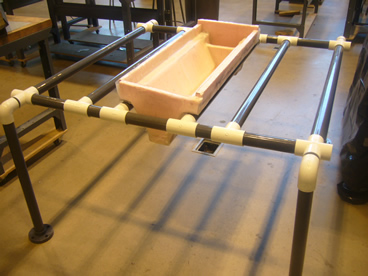
The plumbing system is still under production, however a quick mockup of the structure can be seen on the right picture. This system was designed with mobility, adaptibility, and animal safety in mind. The plumbing is separated into two separate systems, each one providing water and filtration for 4 tank. Each system is likewise constructed of 3 separate stages: the water return, the filtration, the water outlet.
More information about the thought and construction process behind the plumbing system will be posted shortly, once it is completed.
__________________________________________________________________________________________________________________
- Tank Design: CAD Drawings
- Posted: August 5, 2008
-
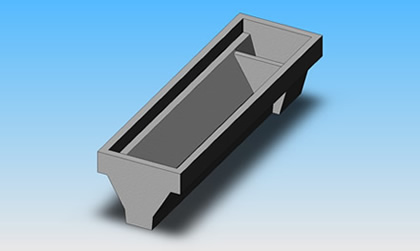
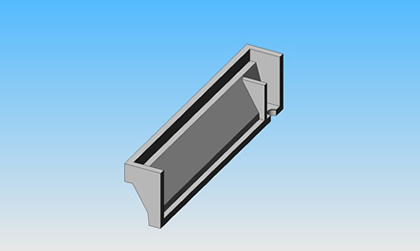
- Although we have already finalized our tank design and begun mass producing, we still have been working on CAD drawings of our tank farm. These CAD drawings will hopefully give everyone a better overall idea of our design and perhaps will promote further research and usage of our design. Pictured above is a 3-D rendering of the complete tank design, with the image on the right displaying a cut-off portion of the tank. Below is 3-D "explosion", showing the several different pieces of foam that come together to form the tank and to the right is an orthographic depiction of our design (with measurements).
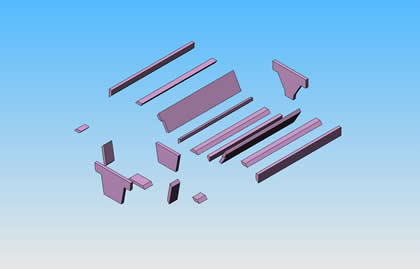
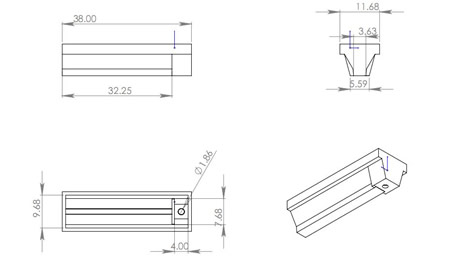
The orthographic images can also be downloaded from here, in pdf format.
__________________________________________________________________________________________________________________
- Mass Production
- Posted: July 30, 2008
-
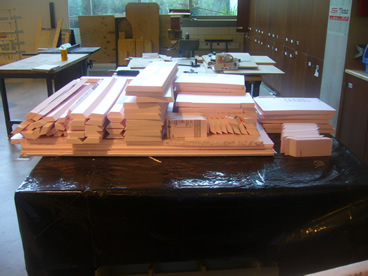
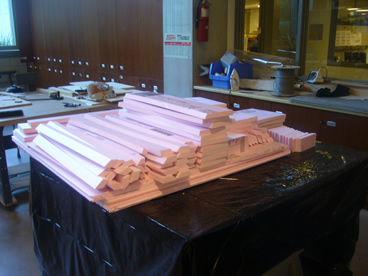
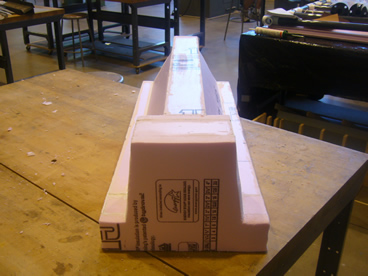
- Today we started mass production of the tank farm. As you see from the pictures above, we started by cutting out all of the foam pieces we will need in order to construct six tanks. Although our final tally will be fourteen tanks, we wanted to start a bit smaller first, just in case any more tweaks will need to be made in our process. So far the process has been smooth and all the pieces came out exactly as planned, we have already caulked two tanks and will be ready to start fiberglassing soon. The current outlook is that by the end of next week, we will have six fully finished tanks awaiting water and urchins.
__________________________________________________________________________________________________________________
- Update: The Second Prototype
- Posted: July 24, 2008
-
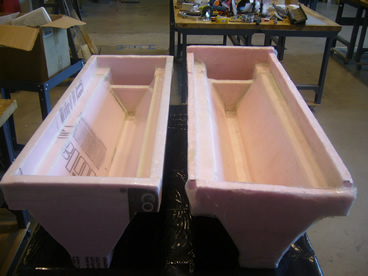
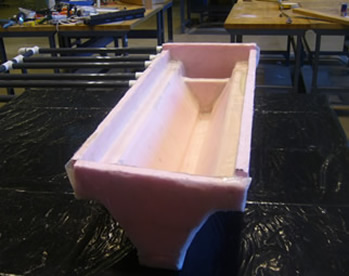
- We tried yet another approach when it came to fiberglassing this tank. Instead of using the inner mold or vacuum bagging, we simply kept the pieces of fiberglass cloth in place with pins. In contrast to how we began our first prototype, we laid down pieces of dry fiberglass fabric on the inside of our tank. We then pinned the fabric to the foam and brushed on activated epoxy, using a squeegee to get rid of excess epoxy. After the epoxy hardened for about two hours, we took out the pins and tried to smooth out the wet fiberglass fabric with our hands. Once the epoxy hardened after 24 hours, we feathered down the edges where the different pieces of fabric met using first course grit, then a finer grit sandpaper. After wiping down the fiberglass with alcohol, we put yet another layer of epoxy, known as the fill coat. This coat ensures that the weave is filled completely with epoxy to make the tank water-tight and to create a smooth finish on the surface.
The picture on the left is of the second prototype with a fill coat drying. The picture on the right is a comparison of the first prototype (right) with the second (left). It is safe to say the second prototype though not completely water-tight yet is a vast improvement over the first.
__________________________________________________________________________________________________________________
- The Second Prototype
- Posted: July 22, 2008
-
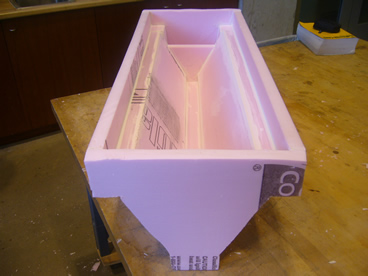
- Today we started working with our second prototype with the method that will hopefully become our standard process. We first began with the wooden female mold as before but this time around we used caulking to attach the pieces together and to fill the inside and outside joints. We felt that using caulking would allow us to achieve an overall better shape as well as assure water-tightness. As seen from the pictures above, the tank already looks aesthetically better than our previous prototype and time will tell if it is in fact water tight. Our next step will be to sand down the caulk once it is dry and begin our fiberglassing process.
__________________________________________________________________________________________________________________
- Tank Storage System
- Posted: July 14, 2008
-
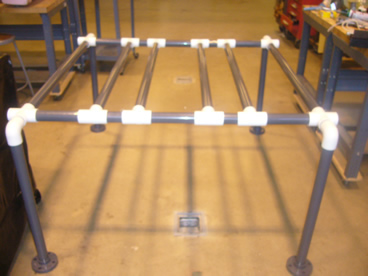
- One of the reasons for creating this tank farm is to allow easy and simple access to the urchins. Keeping with that theme in mind, we wanted to create a storage system that was strong, accessible, and easy to build. We came across the idea of using PVC tubing as our support structure, instead of the traditional metal or wooden shelving. Not only will the storage unit fulfill our requirements, it also comes with the added benefit of being easily interchangeable, so we can add or take off sections as needed.
The pictures above show the first layer of storage unit. As you can see, the tanks will be support by the lip that extends beyond the slanted sides. The supporting tubes are far apart enough that it is easy to remove an individual tank unit without disturbing the others. In its completion, the system will either support 4 tanks per layer on a 2 layer configuration for a total of 8 tanks, or it will support 3 tanks per layer on a 3 layer configuration for a total of 9.
__________________________________________________________________________________________________________________
- Fiberglassing Tank: A New Approach
- Posted: July 11, 2008
-
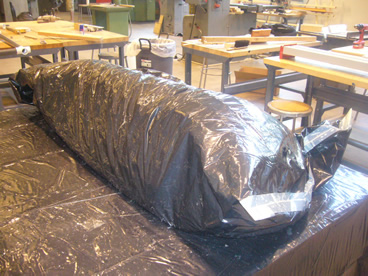
- Our results from the first fiberglassing weren't great. The tank was not completely water tight and many air bubbles formed beneath the fiberglass, giving it a rough and bumpy appearance. We decided to try a new approach, a technique called vacuum bagging for the outside of the tank.
The basic principle behind vacuum bagging is that you place your structure, with wet fiberglass, inside a large bag, seal it, and remove all the air from the bag. The air pressure on the bag causes the fiberglass to adhere tightly to every point in the structure. The picture on the left side shows our approach to vacuum bagging. First we wet all the fiberglass we needed with epoxy and placed it on the foam structure. Then we placed that entire structure into a large polyethylene bag, along with foam (known as breather) that would help keep the pressure applied at all parts equal. Finally, we sucked the air out of the bag and continued to keep the vacuum pump on for two hours before we let the fiberglass sit overnight.
The outcome of the technique (done on the exterior of the tank) was better than our two-mold system, however there were still several flaws. Overall, our first prototype was not a huge success, however it was a good learning experience and shed some light into the changes we'll have to make on our second attempt.
__________________________________________________________________________________________________________________
- Fiberglassing the First Tank
- Posted: July 9, 2008
-
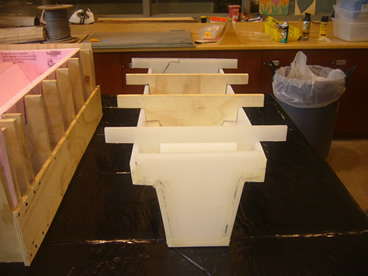
- These are pictures of what the molds looks like when placed together. The top mold will not be taken off until tomorrow, to ensure that the fiberglass takes the shape of the mold while the epoxy hardens. As you can see from the pictures above, we have four separate layers to the mold. The first is the female mold made of plywood that is used to keep the foam in place. The second layer is the foam itself, which acts not only as insulation, but the actual base that will be fiberglassed. The third layer is the fiberglass itself, which has two layers to ensure strength. The last layer is the male mold made from polypropylene, which applies pressure and keeps the fiberglass from moving. Tomorrow morning, when we remove the top mold hopefully, we'll be left with a tank that resembles our design.
__________________________________________________________________________________________________________________
- Update: Sea Urchin Tank Farm
- Posted: July 3, 2008
-
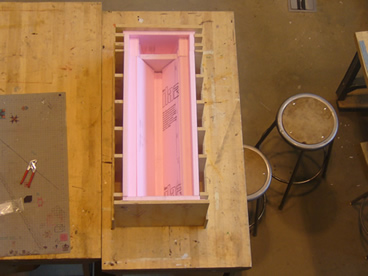
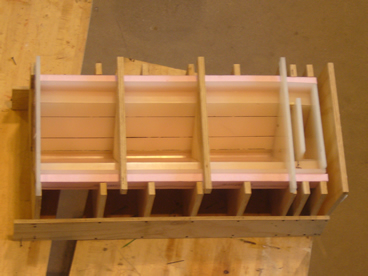
- We have cut all the polystyrene pieces needed and have inserted all of them into the female mold (pictured on left). Before we could begin fiberglassing, we had to construct a male mold that will apply pressure on the fiberglass to ensure proper adhesion to the foam as well as maintain the shape of the tank. The male mold, (seen on the right-hand side) is made from pieces of polypropylene attached to a framework of plywood. Polypropylene was used as the epoxy that adheres the fiberglass to the foam would not stick to the mold and would pry off easily. The polypropylene will hopefully also give the tank a smooth finish. Our next step will be to fiberglass the inside of the tank.
__________________________________________________________________________________________________________________
- Sea Urchin Tank Farm Assembly
- Posted: June 25, 2008
-
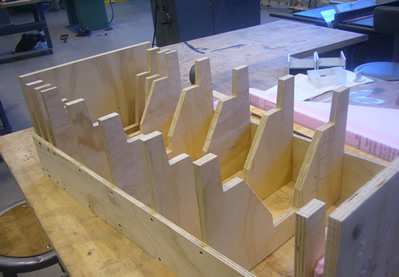
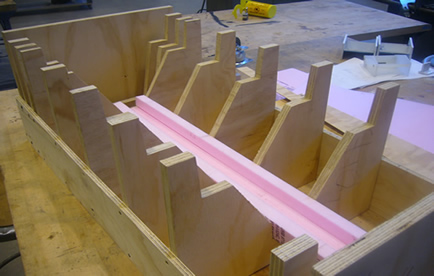
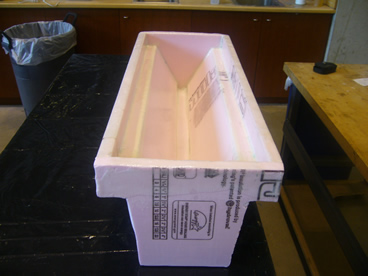
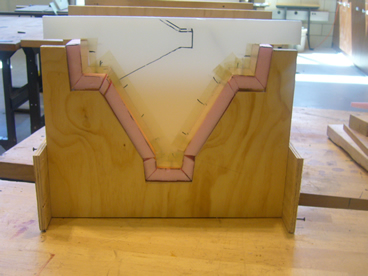
- We are currently using a 60-gallon tank to house the sea urchins we use for our research. We have come to learn that such a large tank is a waste of energy and space as the urchins tend to gather at the top of the tank. To solve these problems, we have designed a completely new tank system, which focuses on slanted, shallow walls. As seen in the picture above, the tank will resemble a V shape, with sides being slanted at a 60-degree angle. This slant serves two purposes: first, it creates a vertical surface for the urchins to rest on; second, it allows us to slide food slowly down to the urchins. The bottom of the tank features a trough, which will collect dirt and debris thus allowsing for easy tank cleanup. Finally, towards the end of one side is an overflow, which will be used to collect water for re-circulation within the system.
The pictures above show different angles of the female mold that will be used to shape the tank. Pieces of polystyrene foam will be cut to fit the mold, and will provide insulation to maintain the low water temperature. In order to strengthen the tank, fiberglass will cover the foam, allowing for a lightweight, watertight design.

Home | Contact Us | Sites A-Z